


The Diary of a Turb Re-Build


Thread Starter

Joined: Jan 2002
Posts: 1,189
Likes: 0
From: Earth
Next week, and after the fuselage registrations have been applied, the following is the list of jobs to get on with:
1. Tailwheel fitted (already overhauled and painted up)
2. Seatbelt harness fitted (already overhauled and length checked).
3. Rudder cables fitted.
4. Fuel tank installed and connected up (already overhauled, pressure tested and new filler cap installed).
5. Windshield fitted (already made, just needs bolting on).
6. Full IFR panel fitted* (as above)
Then, it's a case of temporarily dismantling the polythene cocoon we have been working in, to allow us to do a trial assembly of the fuse/wing.
Excitement on the 10 scale has now reached 9.9993....
* Yeah, ok, I was kidding. We are both purists, and have kept it as simple and authentic as possible. Pic available if desired.

Thread Starter
Joined: Jan 2002
Posts: 1,189
Likes: 0
From: Earth
I've delayed giving her my own personal name until I have flown her. What she is christened will most probably reflect how she flys/handles.
I just hope I don't end up calling her Emu!!
I just hope I don't end up calling her Emu!!
Thread Starter
Joined: Jan 2002
Posts: 1,189
Likes: 0
From: Earth
Tinkering
Due to other commitments today, I only had time for some tinkering this morning. So I decided to:
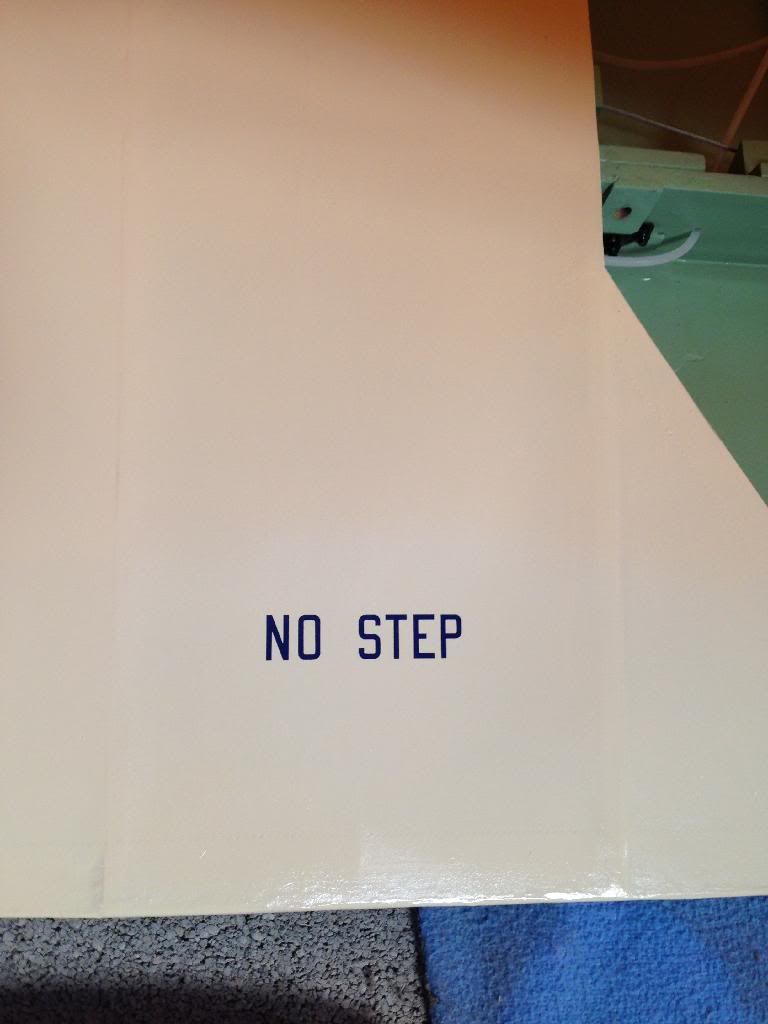
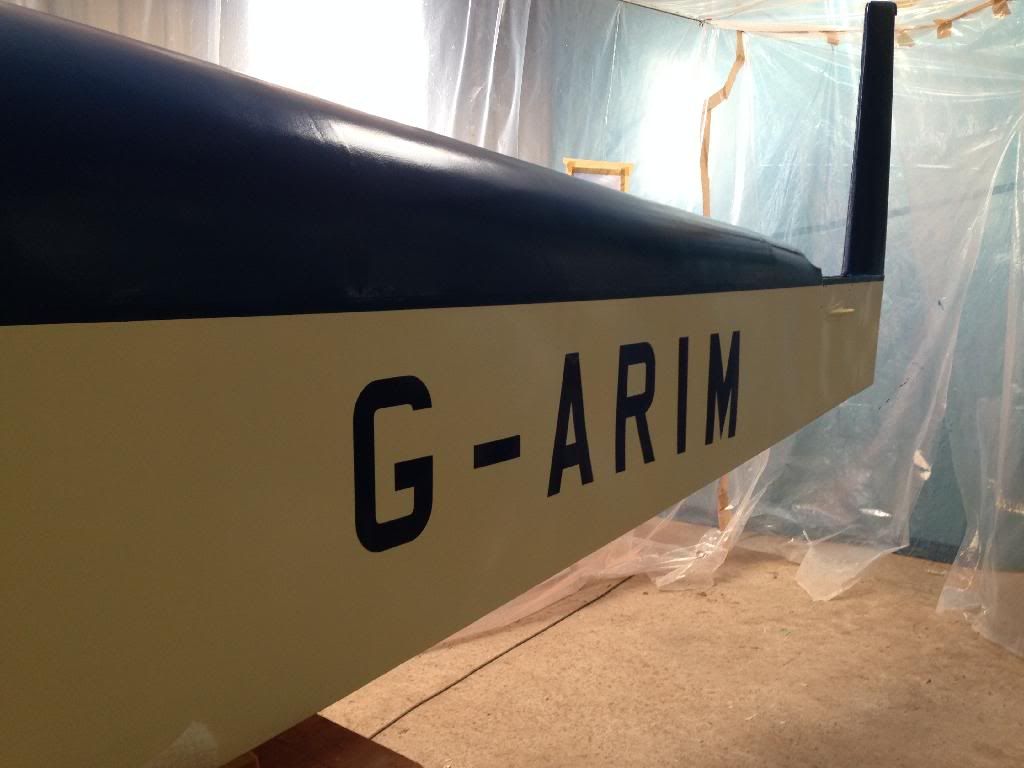
Add the NO STEP graphic to the port wing root. It's an inch high, and done in the same post-war RAF font as the registrations, and in the same colour.
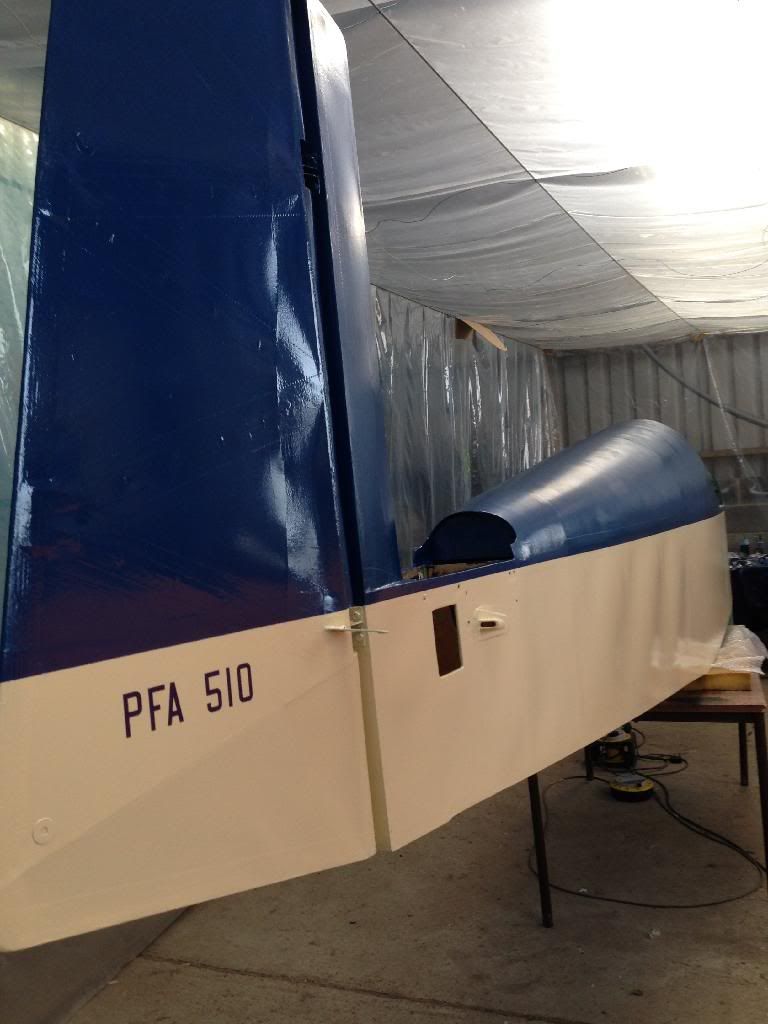
As mentioned, Sam and I debated about the best thing to have on the tail, and in the end we decided to go for a subtle, lower down the rudder serial number, once again in the same font and colour. Many of the Turbulent fleet have old PFA serial numbers of between 450 and 550, so we felt this was fitting to its age, and somewhat respectful to the good old PFA, without whom many of us wouldn't be flying today.
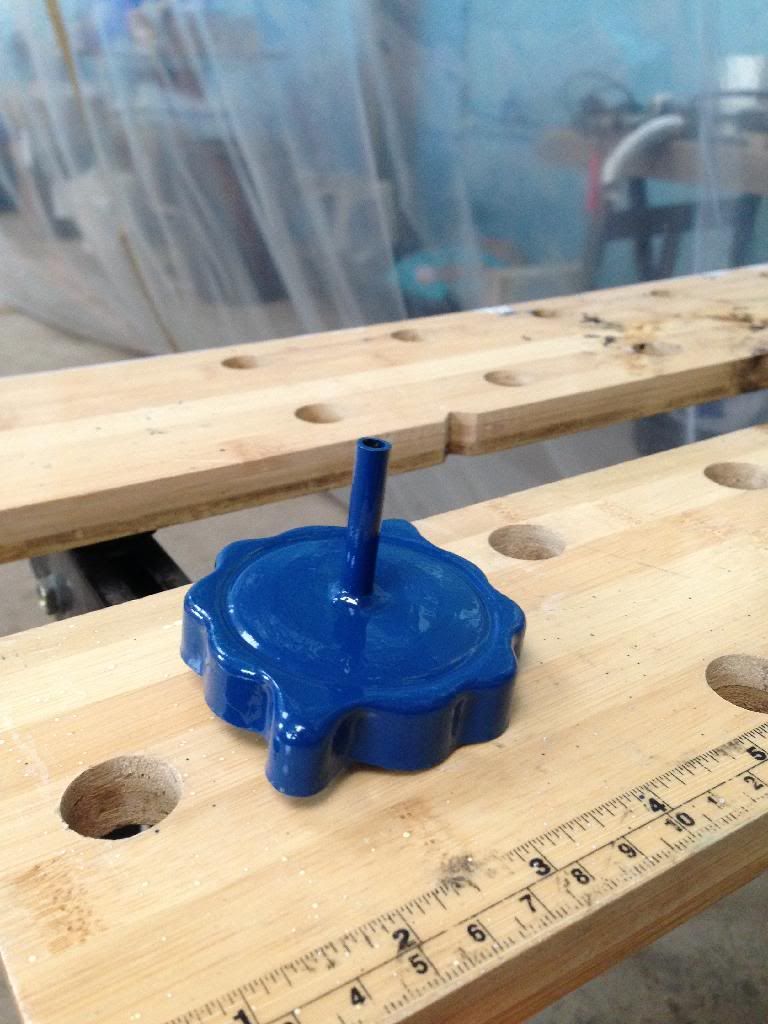
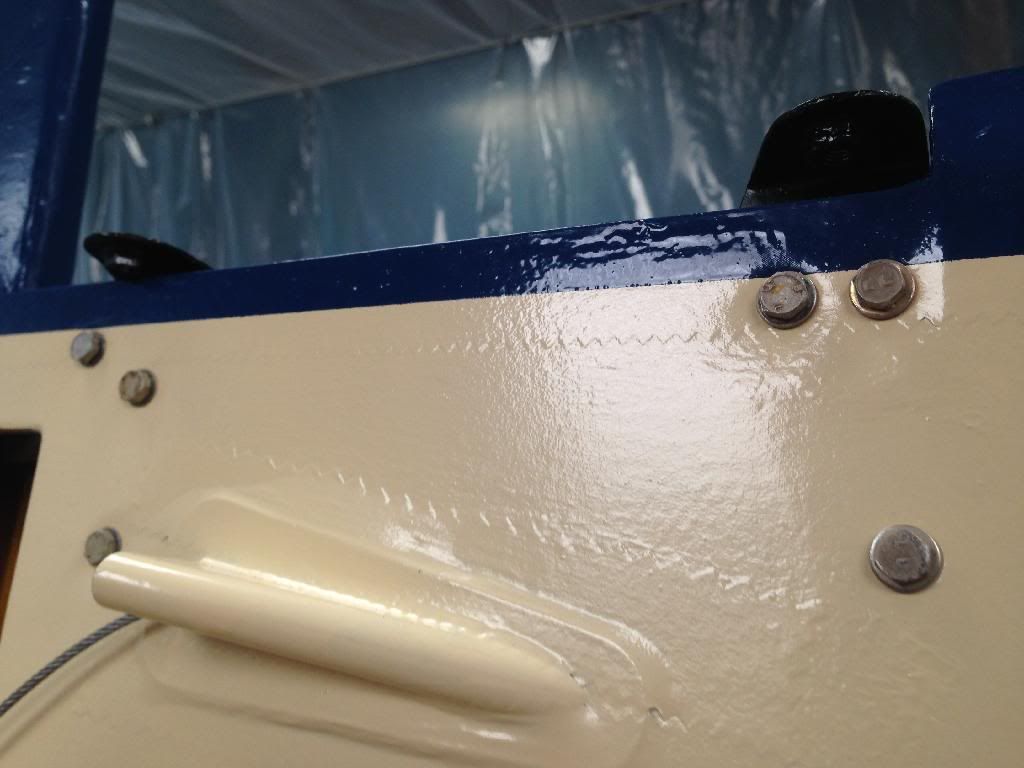
And finally, some really obsessive tinkering, the painting up of the fuel tank filler!! The filler has had a little protruding tube that we had welded to it to support the fuel gauge wire, which is simply a piece of wire with a petrol/ethanol proof float on the bottom. I have one in the Cub and it's guaranteed to be accurate every time!
Registrations going on fuselage tomorrow....
Add the NO STEP graphic to the port wing root. It's an inch high, and done in the same post-war RAF font as the registrations, and in the same colour.
As mentioned, Sam and I debated about the best thing to have on the tail, and in the end we decided to go for a subtle, lower down the rudder serial number, once again in the same font and colour. Many of the Turbulent fleet have old PFA serial numbers of between 450 and 550, so we felt this was fitting to its age, and somewhat respectful to the good old PFA, without whom many of us wouldn't be flying today.
And finally, some really obsessive tinkering, the painting up of the fuel tank filler!! The filler has had a little protruding tube that we had welded to it to support the fuel gauge wire, which is simply a piece of wire with a petrol/ethanol proof float on the bottom. I have one in the Cub and it's guaranteed to be accurate every time!
Registrations going on fuselage tomorrow....
Thread Starter
Joined: Jan 2002
Posts: 1,189
Likes: 0
From: Earth
It is a gloss paint, but it is possible to matt it down with a light 'dry roll' when it's partly dry. We prefer a less glossy finish ourselves, but everyone's taste is different I suppose.
That's a lovely glider you have there.
That's a lovely glider you have there.

Joined: Jan 2009
Posts: 1,546
Likes: 2
From: Oxford, UK
MC - hello! Beautiful photos, beautiful project, and Mrs. M. should be grateful as years will be added to your life and your new youthful slender frame should make up for all the evenings devoted to your beautiful baby! Alas, though provision is made for the vineous cargo, where is the second seat to take her for a flight with the wind in her hair? - guess it will have to be the Cub, with the doors off...
So much work goes into frame, fabric, finish. My beloved GOFER Supercub was sold to White Waltham, in superb condition thanks to the labours of my engineer, who spent a very cold winter in a similar plastic construction breathing fumes! I will forward your epic to him to enjoy.
My daddy was a boatbuilder and sailor, so educated me properly in the ways of navigation, met, and caution...so many happy hours flying and good company.
Do drop in to Shenington (Edgehill) when your baby is fully fledged....
Mary

Thread Starter
Joined: Jan 2002
Posts: 1,189
Likes: 0
From: Earth
Next week will see some more progress.
Cub Permit was this week, and other minor set-backs like kids breaking hands playing rugby, flooding returning and a few problematic issues with unwanted visitors...
Weirdly, I'm also finding Light Aero Spares are taking ages to deliver these days, compared to their usual 24 hour turnaround. I made an order on Tues and have been told it'll be next week when I get it....
There must be a few 'internals' going on there.


Thread Starter
Joined: Jan 2002
Posts: 1,189
Likes: 0
From: Earth
Progress has been good this week.
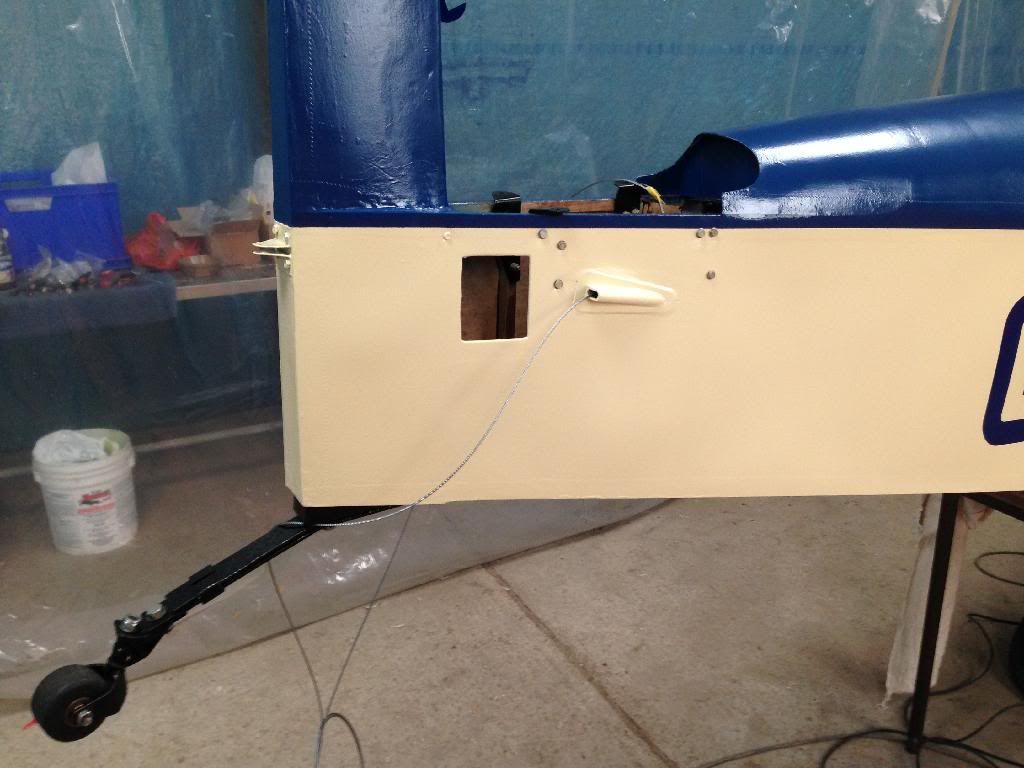
Tailwheel is now on:
Mounting brackets for the stabiliser have also gone on:
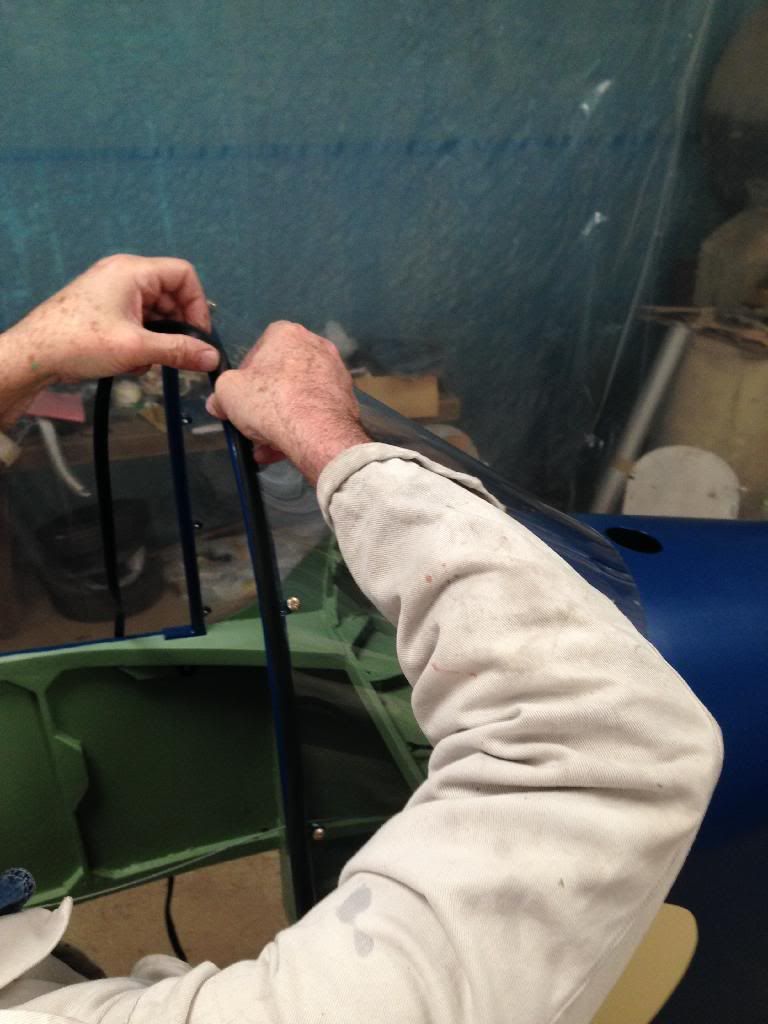
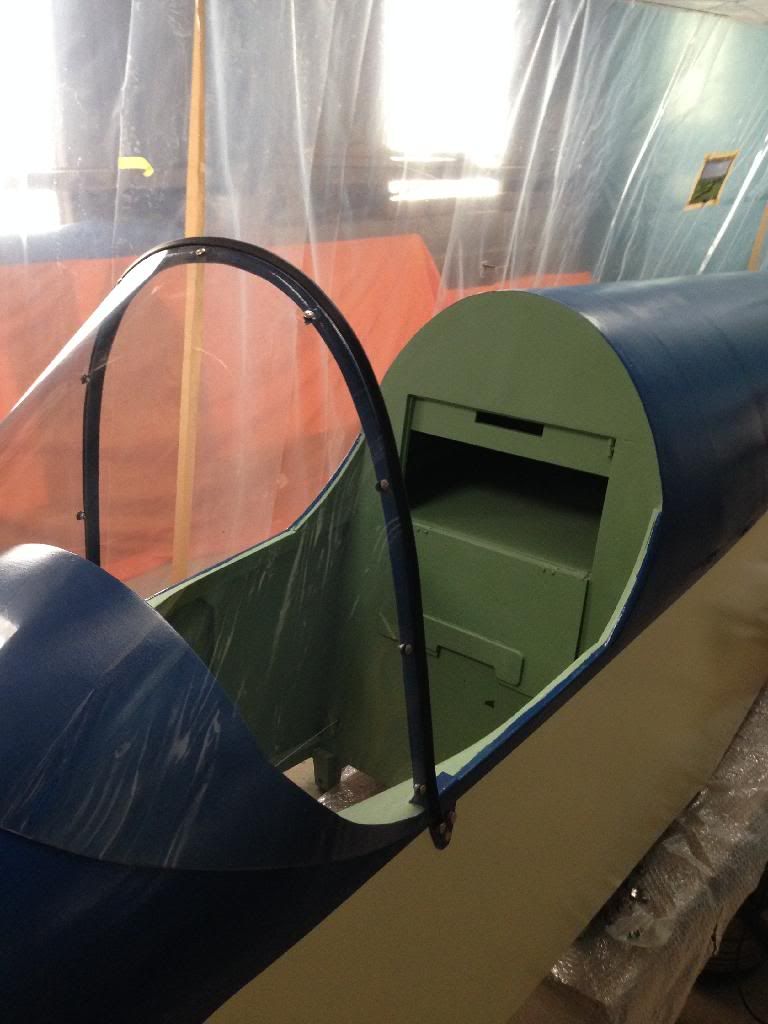
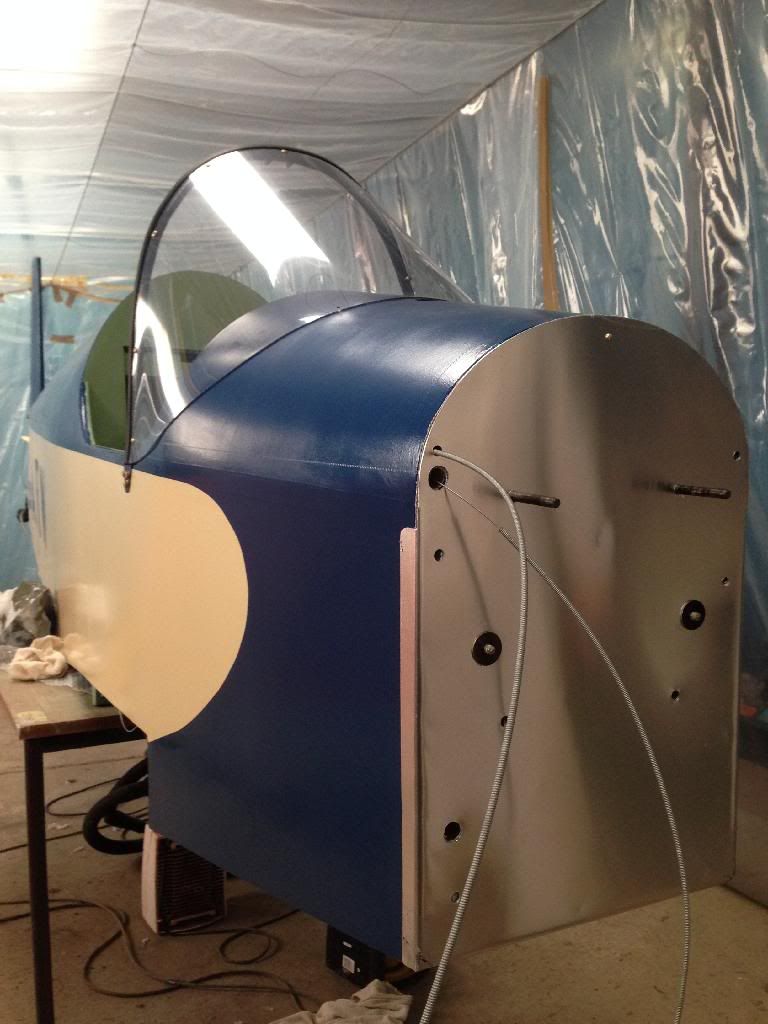
Next it was a case of getting the rollover bar and windscreen fitted. This was finished off with some neat trim around the perspex:
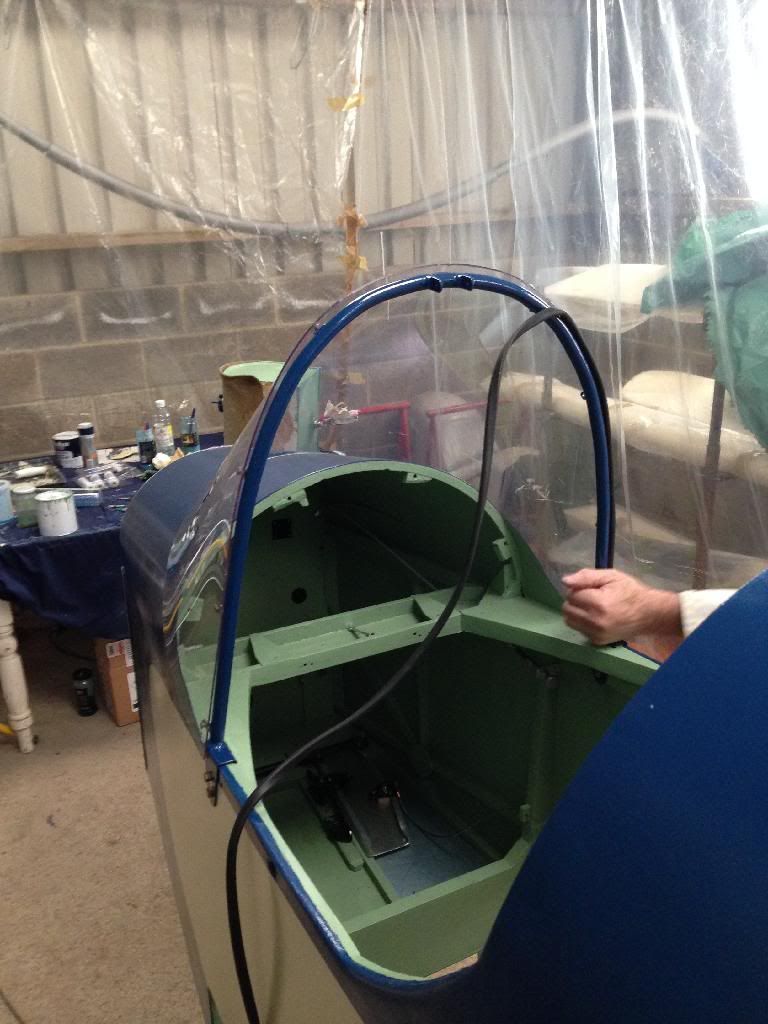
The finished job:
There were some annoying bits of dust that had got trapped so we decided to blast them out:
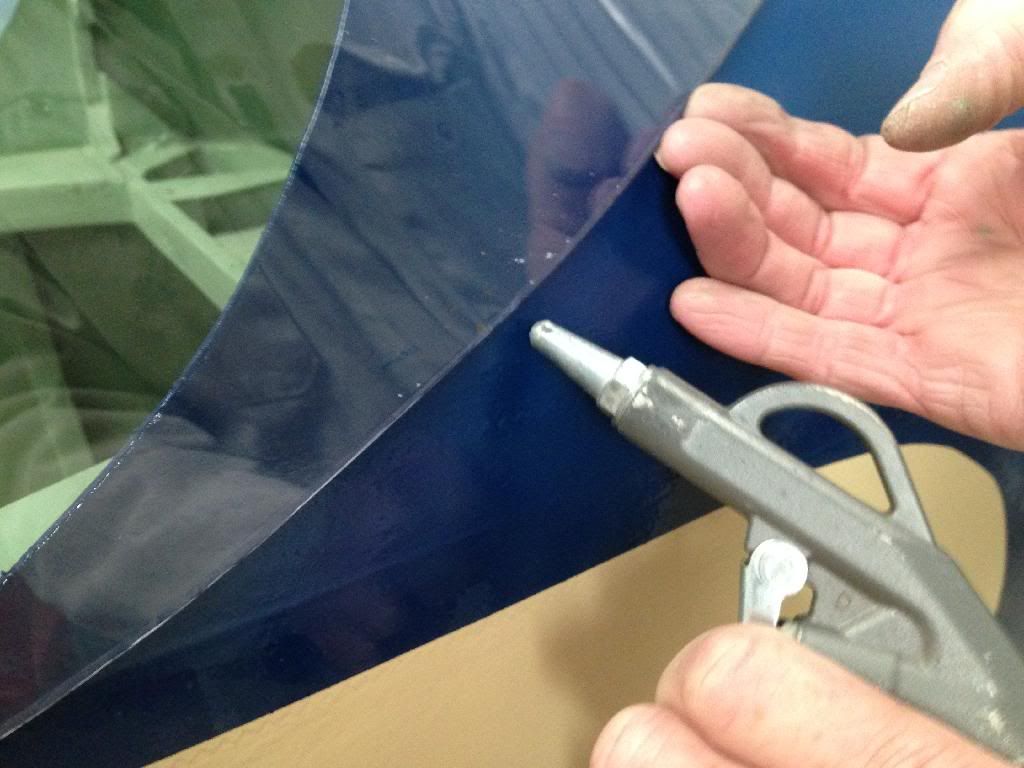
We will be adding some trim where the windscreen meets the fuselage, mainly to ensure no air creeps underneath, and also for aesthetics.
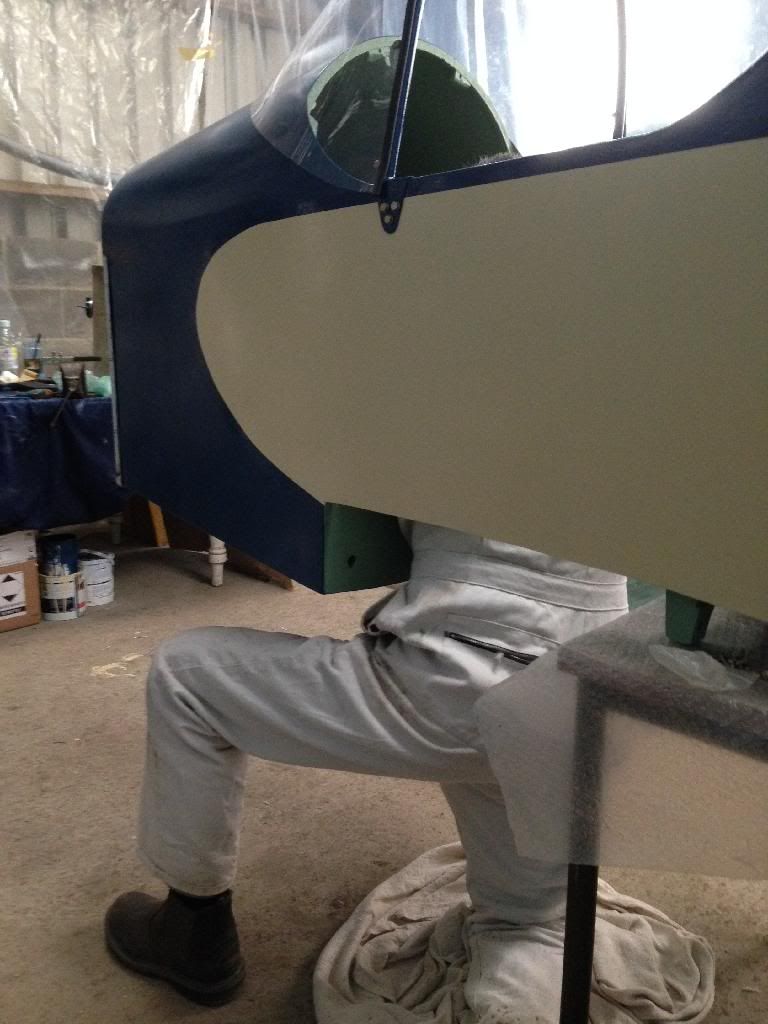
The fuel tank was tricky to get in, but we managed it eventually:
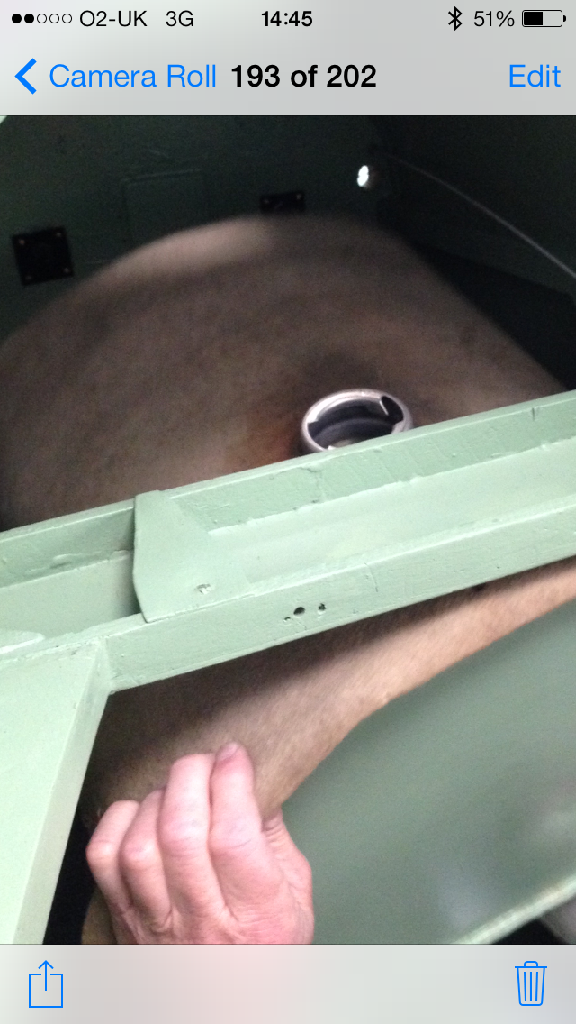
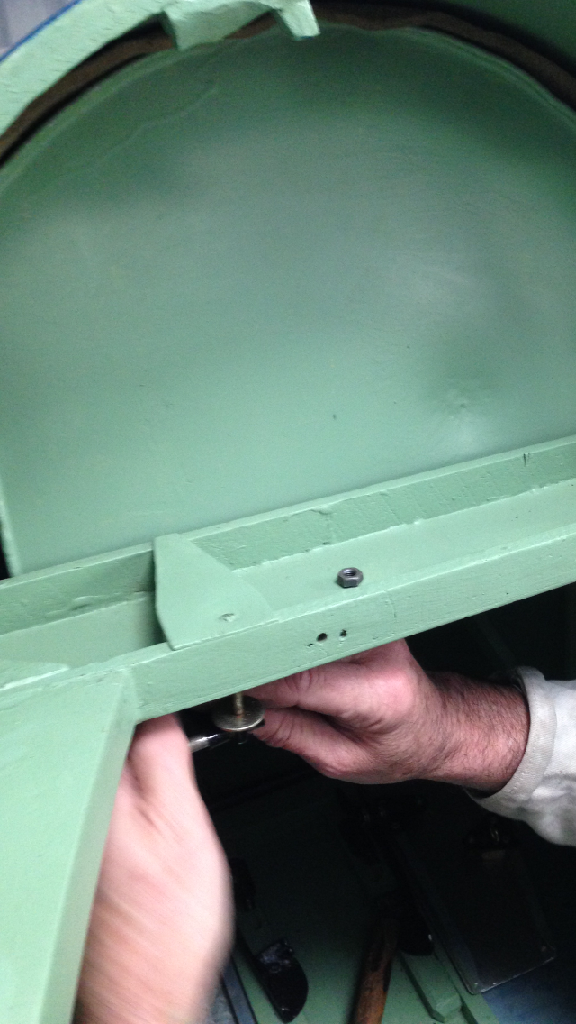
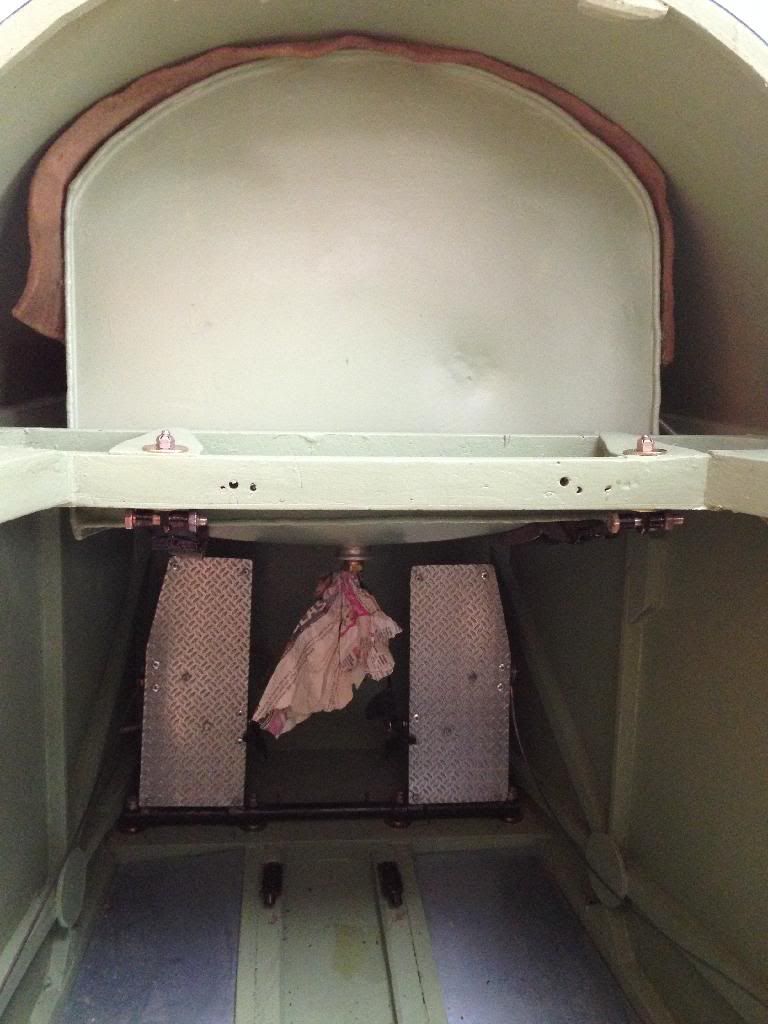
Sam spent a fair bit of the morning like this...!
Firewall all installed:
Rudder cables are installed and ready for crimping at the correct length when the rudder goes on, and the pilot harness cables are all ready for a simple attachment to the harness when it goes in.
The panel will be going in next, followed by some trim on the side of the cockpit/fuselage side. After that, and a few other smallish jobs, we will be putting the undercarriage on the wing, ready for trial wing/fuselage assembly....
Would write more, but pretty tied up with other bits and pieces this afternoon.
Tailwheel is now on:
Mounting brackets for the stabiliser have also gone on:
Next it was a case of getting the rollover bar and windscreen fitted. This was finished off with some neat trim around the perspex:
The finished job:
There were some annoying bits of dust that had got trapped so we decided to blast them out:
We will be adding some trim where the windscreen meets the fuselage, mainly to ensure no air creeps underneath, and also for aesthetics.
The fuel tank was tricky to get in, but we managed it eventually:
Sam spent a fair bit of the morning like this...!
Firewall all installed:
Rudder cables are installed and ready for crimping at the correct length when the rudder goes on, and the pilot harness cables are all ready for a simple attachment to the harness when it goes in.
The panel will be going in next, followed by some trim on the side of the cockpit/fuselage side. After that, and a few other smallish jobs, we will be putting the undercarriage on the wing, ready for trial wing/fuselage assembly....
Would write more, but pretty tied up with other bits and pieces this afternoon.
Last edited by Monocock; 6th March 2014 at 16:15.
Thread Starter
Joined: Jan 2002
Posts: 1,189
Likes: 0
From: Earth
Hi bingo,
You're right, it is. It was a toss up between having a bit of 'rake' on the screen, or a really dorky looking vertical one. We went for the slightly more raked one. The filling will be no different to how it is for my Cub, or Sam's Luton. We'll need to be careful, but luckily there'll be no need for ladders etc, and we can always protect the screen with a cloth/sheet during re-filling.
You're right, it is. It was a toss up between having a bit of 'rake' on the screen, or a really dorky looking vertical one. We went for the slightly more raked one. The filling will be no different to how it is for my Cub, or Sam's Luton. We'll need to be careful, but luckily there'll be no need for ladders etc, and we can always protect the screen with a cloth/sheet during re-filling.
Thread Starter
Joined: Jan 2002
Posts: 1,189
Likes: 0
From: Earth
Many people have asked what the total cost is to date.....
I'd be interested to hear some guesses before I disclose the figure. Let's just say it's just got to a nice round figure, so now's a good time (with not much left to buy for her) to see what people estimate the complete build costs to be.
I'd be interested to hear some guesses before I disclose the figure. Let's just say it's just got to a nice round figure, so now's a good time (with not much left to buy for her) to see what people estimate the complete build costs to be.

Thread Starter
Joined: Jan 2002
Posts: 1,189
Likes: 0
From: Earth
Hi Desert,
Sadly, Mr Druine is dead. If he wasn't, I'd happily pass his contact details on to you as I'm sure he'd welcome your technical views on this matter. As it stands, his design is well proven, so we feel quite happy to go along with it.
The fuel tank in my Cub is in exactly the same place too. Mr Piper built a few Cubs with such fuel tank locations, so we feel reasonably happy that it'll be ok.