03/02/14
I'm in a bit of trouble..........
On Friday, Sam asked me to make sure that the Cowshed was nice and warm this morning ready for us to cement the tapes over the freshly stitched wing ribs. I diligently went over to the workshop at 0800 hours and set up the heater from the farm office in the Cowshed and left it running on FULL to allow it to heat up. The idea is that when the heat is up and the humidity is lower, there is less chance that the cement will bloom, and go all white as it dries.
I popped back to get something from the house an hour after we got started work (1130 ish) and couldn't find Mrs M anywhere in the house. So, I called in to see if she was in the office, only to find her doing the VAT return on her computer with two Puffa jackets on, gloves, and she was sporting a rather blue hue to her face. I think that'll be dinner somewhere nice tonight.....
Anyway, the tapes are on (both sides) and tomorrow's job are the tapes on the trailing edge, wing tip, and leading edges.
Then, after some checking over the fabric for any raised areas of cement, it'll be time to don the roller again.
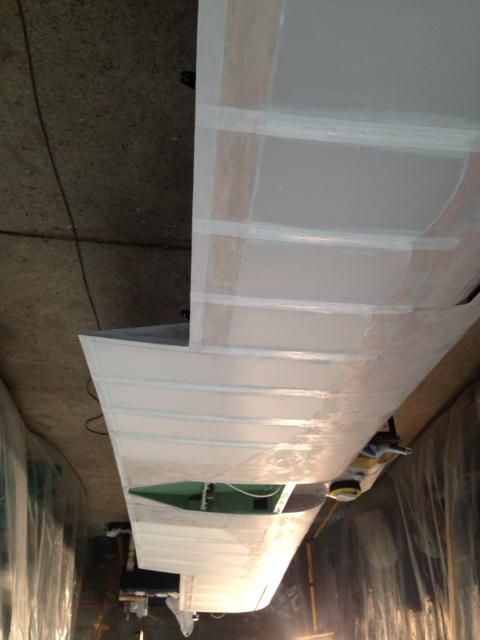
Applying cement to give the cement that is brushed onto the tapes something to bite onto:
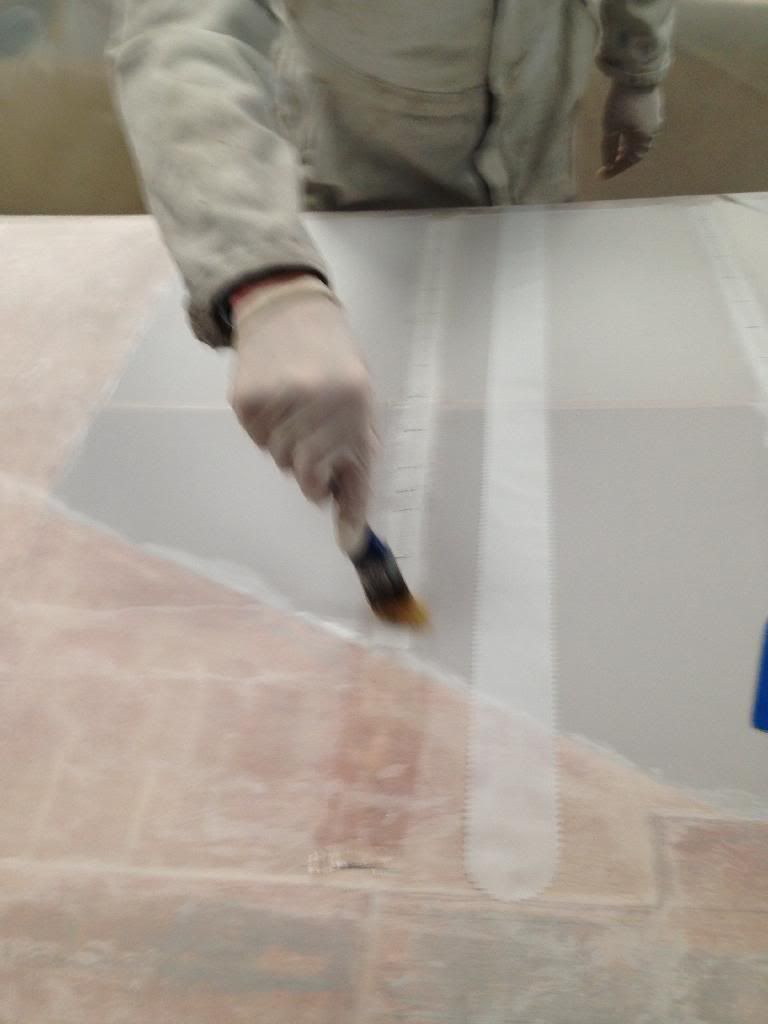
Getting ready to attach the tape, making sure that it runs perfectly parrallel and that it has a nice round (pinked edge) front to it:
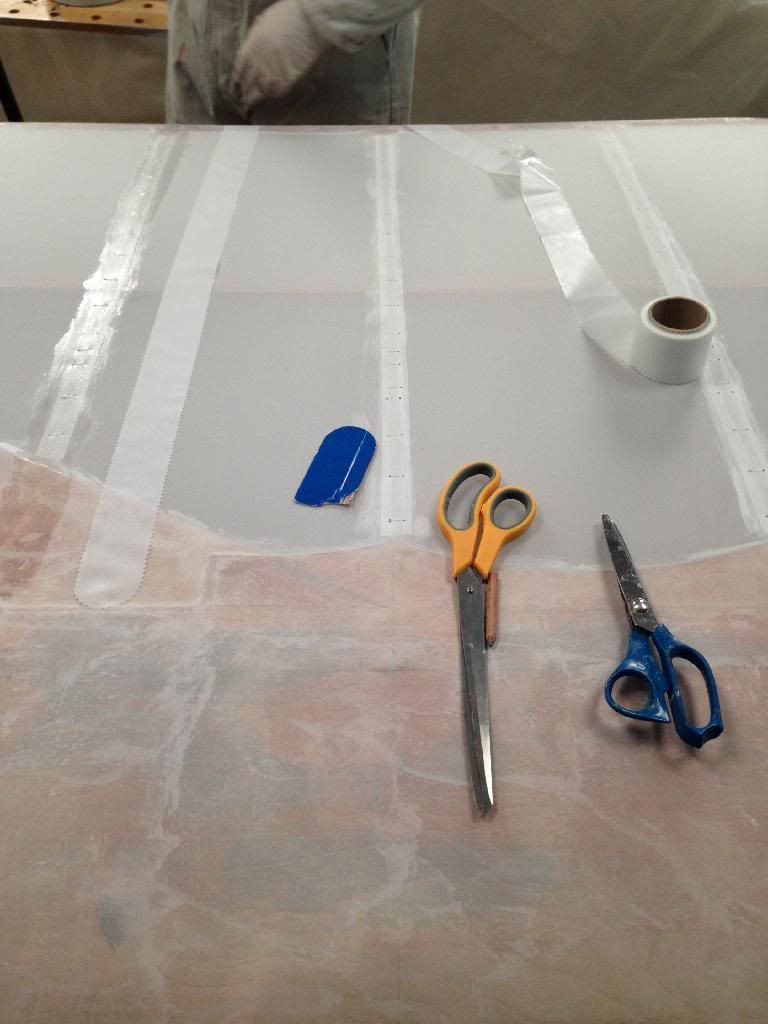
All done:
04/02/14
Mrs M had defrosted by about 1900 hours last night, which was good. It was also just in time for her to realise we were going to be taking the heater again for another day.... I blamed Sam, and he went along with it which was good... It's not a problem, and the VAT return can just wait for a few days.
We had some more tapes to apply today, and we did the trailing edge, the wing tips and some other ones in the aileron recesses etc. These are to make sure that the rib tapes etc don't peel in the future, and basically tidy it all up nicely.
A 3 hour session reduced to 60 seconds is shown below...
Tomorrow, we have a small admin' job to do as part of the paint MOD process, so the rest of the tapes (leading edge) will have to wait until Thursday.
By 1430 hrs today we were both getting hungry ad grumpy so we decided to call it a day. I'm limiting myself to 1600 calories a day for the next 8 weeks to get down to Turb-weight of around 12 stone. I see it as a good way for me to retain a racing-snake-like physique (!!) through my 40's and beyond! Well, I'm burglered if I'm going to spend all this time on the aircraft and only be able to look at it for the next 20 years!!
After some lunch and sorting some emails I decided to conquer a fear of mine. I've been worrying that the Frog Tape (posh masking tape) will remove a neat strip of cream paint when I remove it after adding the blue colour trim. So, I decided it was time to go for it. This time, (I don't really know why) I decided that the kitchen table would be a good place to do it. Warm, clean, light, and near the kettle*.
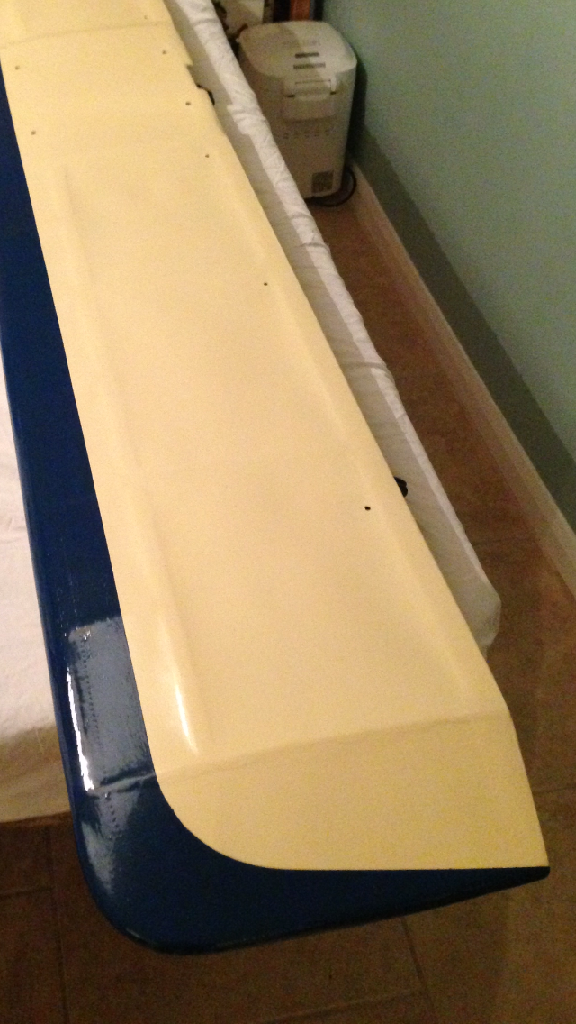
So, I set about masking the line that I wanted and getting the Royal Regatta (blue paint) ready. It does go on very well compared to the cream that requires more coats. I'm also really pleased with the two colours and how they go together. So, within 20 minutes I had a stabiliser with a nice blue leading edge, and a sudden (well, that's what I told her) realisation came over me that it couldn't be moved until it was dry....
An hour later a Domino's scooter came down the drive and the kids were chuffed that they could eat their Meat Feast pizzas I had ordered them in their TV room without being moaned at. Mrs M is just eating some pasta I made for her on her lap in the drawing room.... She isn't aware of how long the kitchen is out of bounds for, but I reckon it'll be a coupl'a days, at least...
Stabliser nearing completion
* Not for any clever technical reasons, just for some occasional Assam Pekoe.
05/02/14
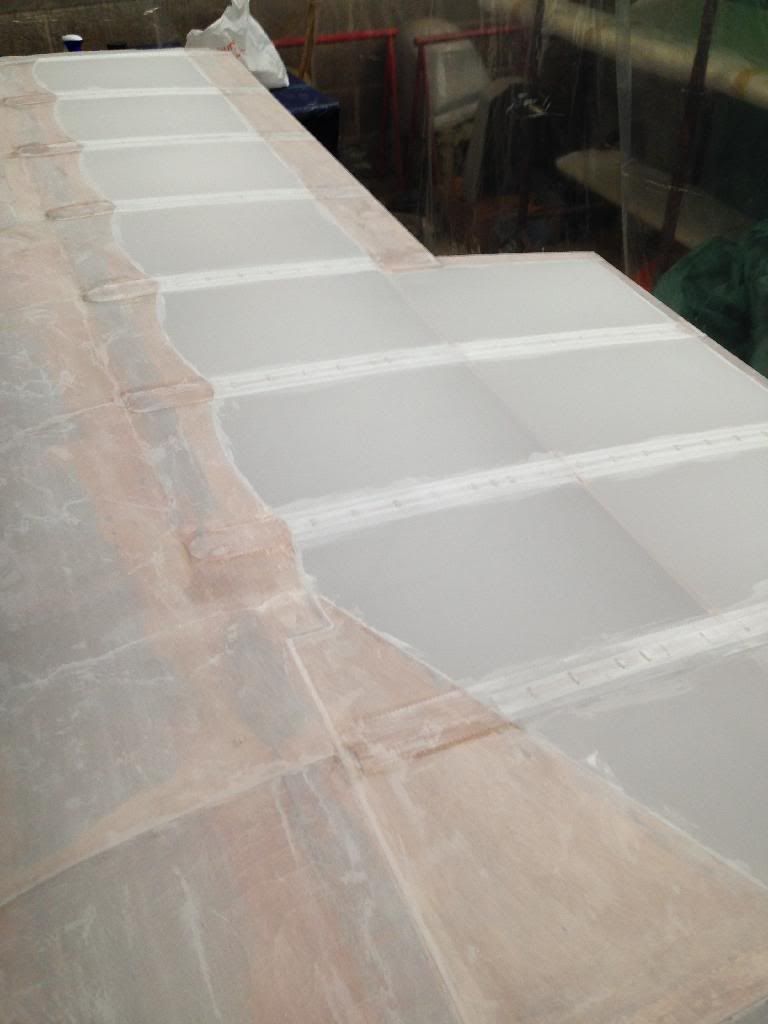
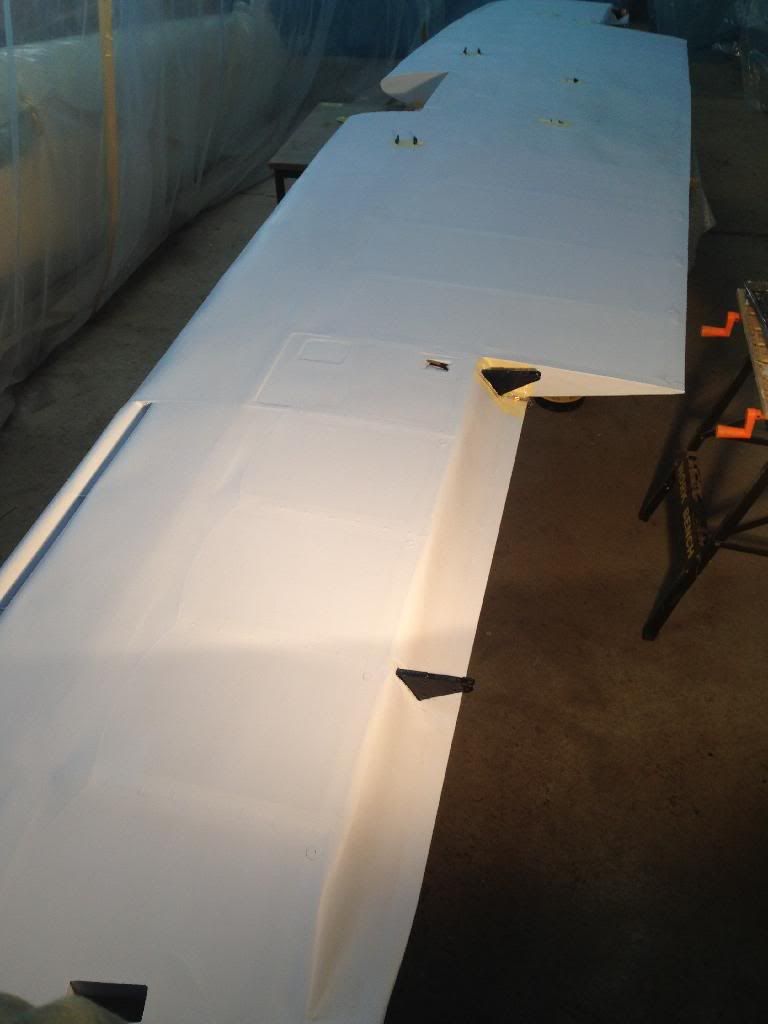
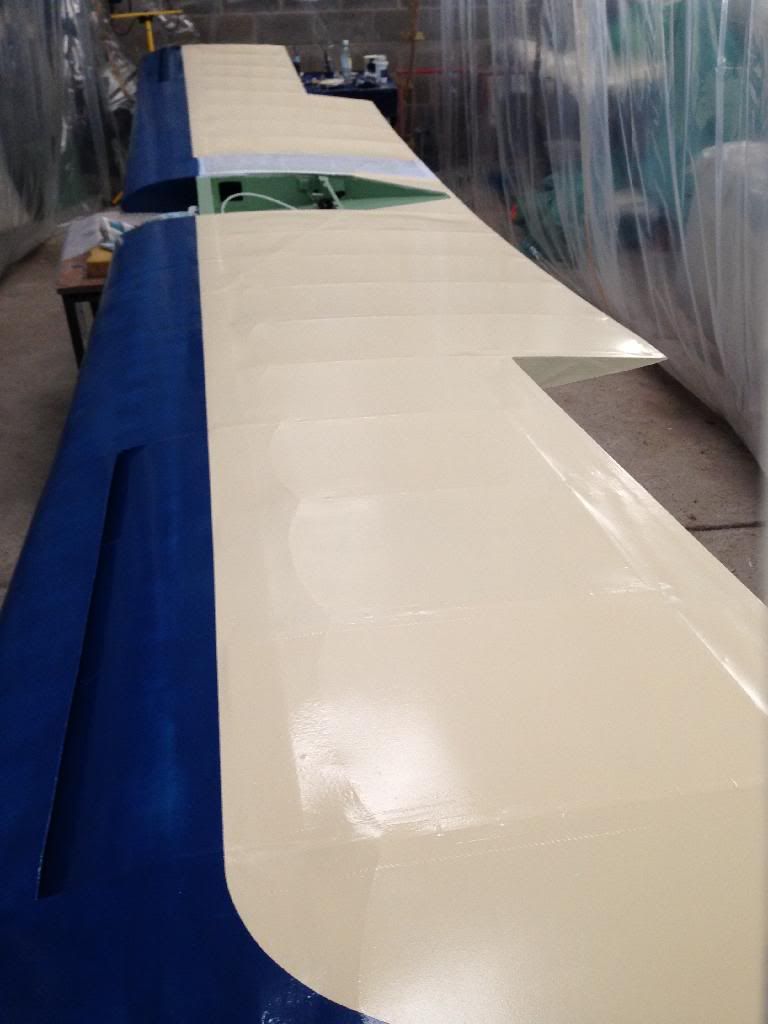
We spent a fair bit of time today going over both sides of the wing making sure any imperfections in the surface (any small lumps of fabric glue, hairs, dust etc) were all removed. A couple of final tapes were also applied in the wingtip slatted sections to ensure a tidy finish in this area.
It was then a case of going over the wing with a fine mist spray (water) and clean cotton cloth to make sure there was nothing that could get below the paint.
Wing completely finished and ready for paint
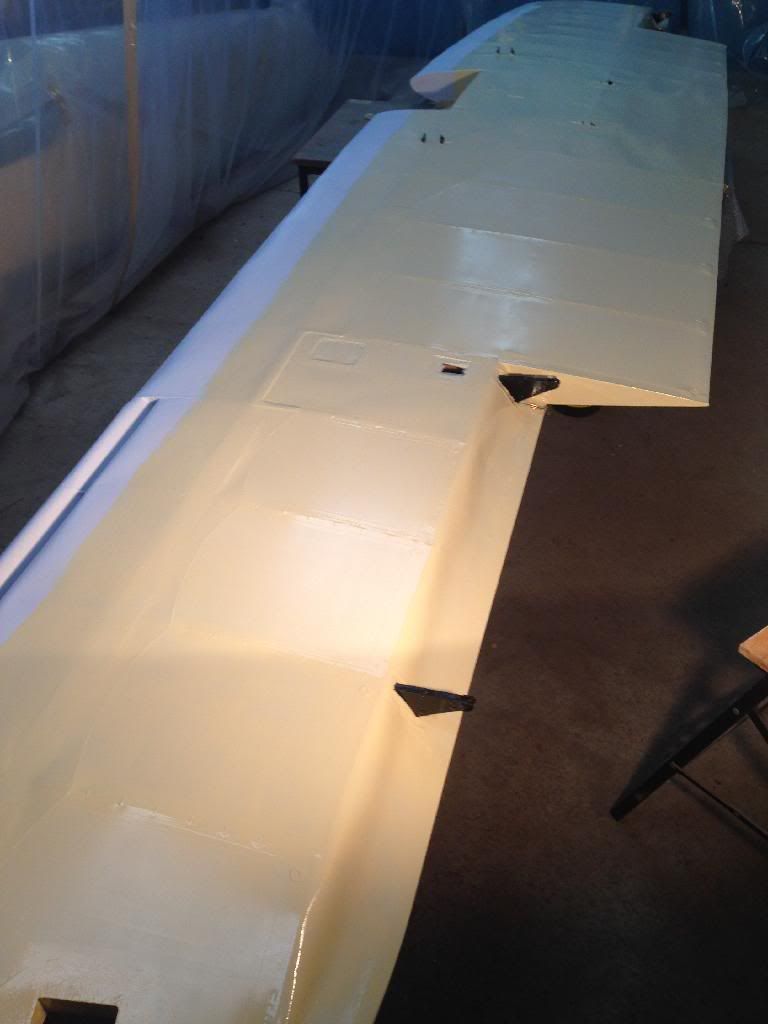
First coat of paint on top side. Second one later tonight.
08/02/14
Second undercoat applied late last night to underside of wing.
First top coat this morning. Leading edge will be in the Royal Blue (after careful masking), hence I've left it.
10/02/14
Second and last coat of blue on underside of wing tomorrow. Then, we'll flip her over and do her top. I've got the masking process sussed now, after learning from a minor dropping of a bolleauk when doing the rudder.
The farm might flood, but the Turb will go on regardless. If needs be, I can put the Turb in the house and the house furniture in the farm buildings.
19/02/14
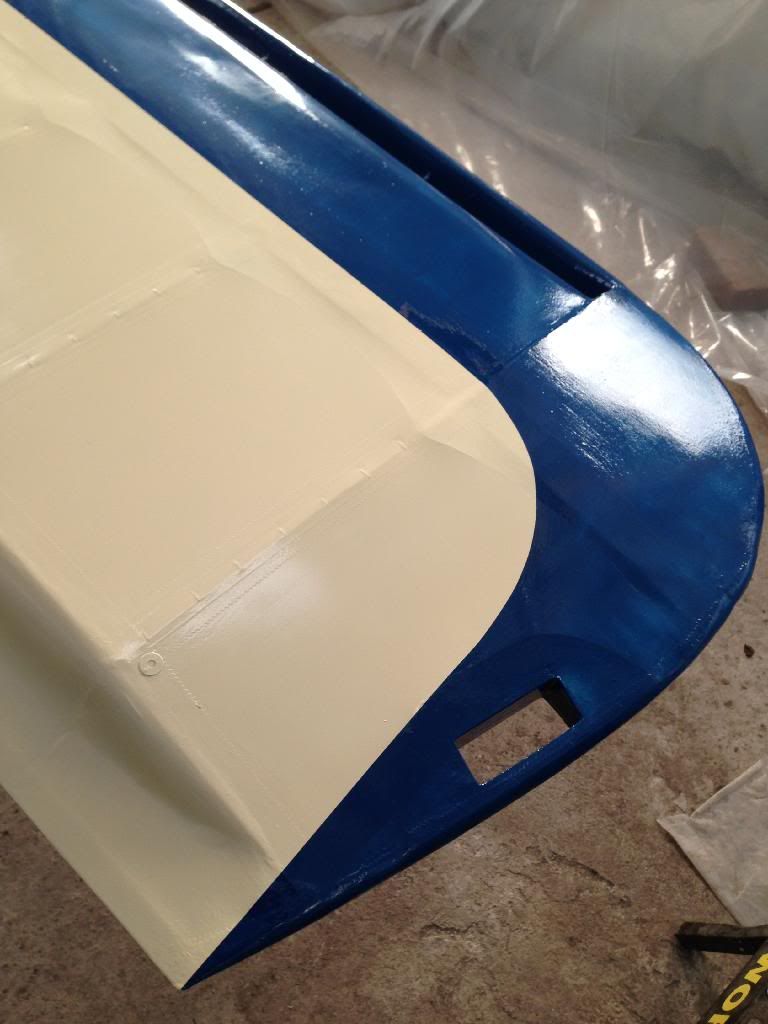
I decided the cream coat was dry enough to apply the blue leading edge to the top side of the wing this morning.
Masking (Frog tape, as advised) was used to create a decent paint seal and to stop any seepage into the cream. I took ages over getting the line right, even though as someone correctly pointed out, if it's a few mm out either side it is impossible to tell when each end will always be 25 feet apart!!
As you can see, I got bored waiting for the cream to be dry enough to apply the masking tape safely, so I had already casually applied thin coat of the blue (well within the planned final line) and timed it so the next coat would go on at the right stage of drying (just past tack dry).
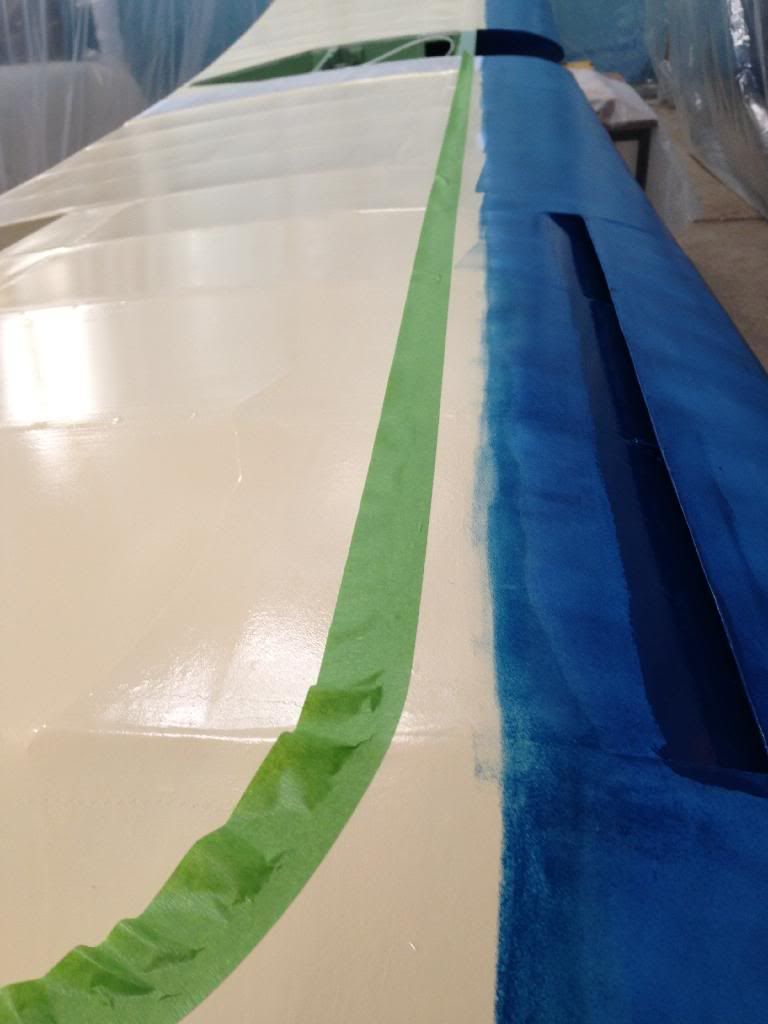
I then find it best to do a single decent coat along the mask line before getting the tape off mainly because I find it best to remove the tape reasonably quickly (within 15 mins) after applying to minimise the risk of any paint uplift when peeling off. So, after tape removal I then fill in the gaps. This is with 1.5 coats with a final one to go on tomorrow.
I ordered the wing walk paint this morning from LAS, and that'll be going on by the end of the week too. Then it's time for application of the registration letters (after some clever working out how to avoid inspection hole panels....) and then wrapping up ready for assembly.
All that'll be left to do then in terms of painting is the blue on the fuselage. That'll be next week, and when that's being done Sam will be able to start fitting out the fuel tank, final panel installation and various other fuselage bits.