18/12/13
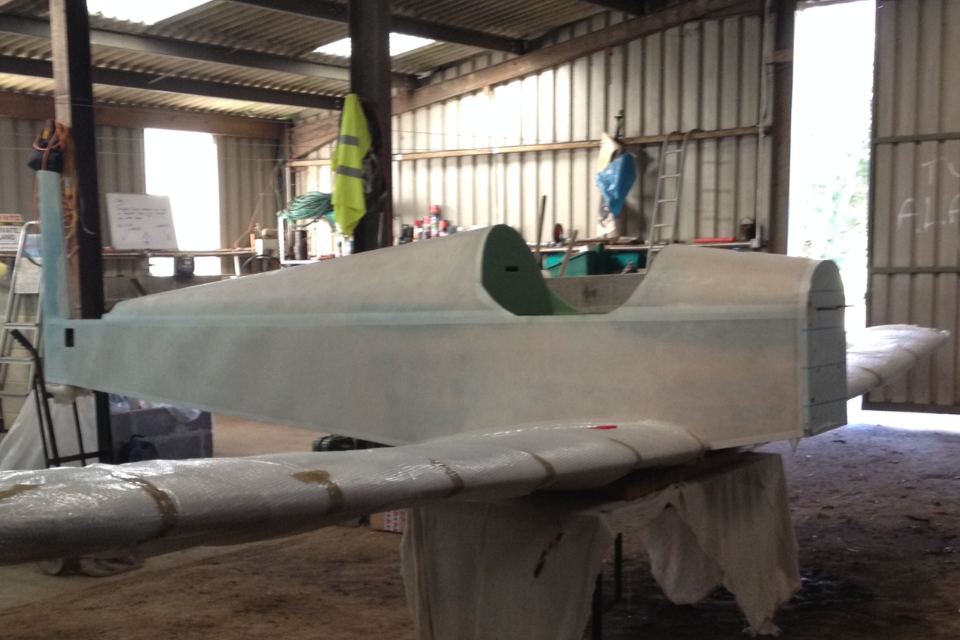
Well, the fabric work is all finished, and has been prepared for painting. I've learned a lot about fabric work, and the importance of careful preparation before going ahead with each stage. I'm now very conscious of the fact that the fabric application work isn't actually what takes the majority of the time, it's the attention to detail to get it looking really good that eats up the hours.
In the last week the firewall has been installed, along with a secondary fire retardant material shield between the fire wall and the wooden fuselage. The neat cable holes have been made for the carb heat, throttle and choke to pass through, and these controls have been attached to the panel. We had to make sure (by temporarily installing the fuel tank) that the cables weren't going to foul on the tank as they exited the back of the panel, and it's all looking pretty neat. We opted for carb heat and throttle to be on the left hand side of the panel, and choke to the lower right by the pilot's knee, to keep all flying controls above the level of the base of the panel.
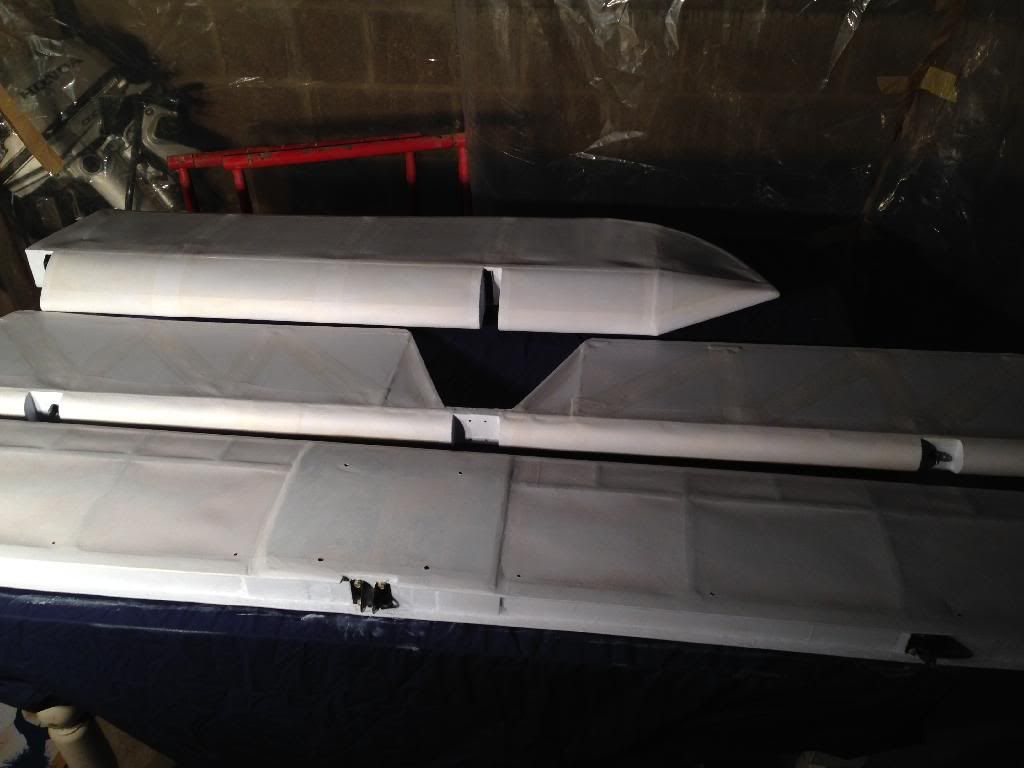
Today we decided it was time to temporarily attach the wing to the fuselage to firstly check it all lines up since the fabric work has been completed, and also to allow us to mark the points where the two colours will start and stop for the paint scheme.
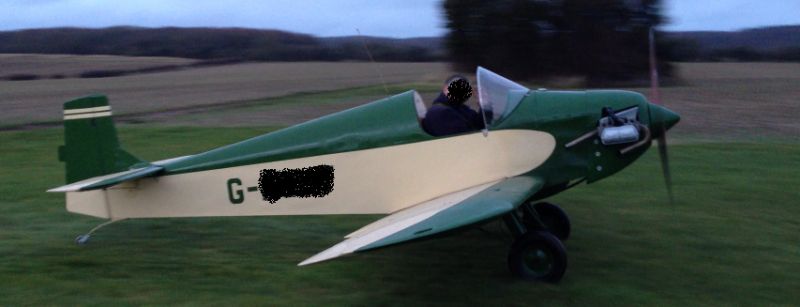
As I think I have mentioned before, we are going with an Oxford Blue and cream version of the scheme below. It should look quite nice.
We lay the airframe out and it fitted together well, and without any difficulty. The bubble wrap on the wing (before anyone asks....!!) is purely to protect the recently shrunk/glued fabric whilst being stored and waiting for paint.

We are sorting out various trim parts at the moment too, such as the frame for the windshield which I'm in the process of painting.
Paperwork has been submitted to the LAA for a modification to the standard dope painting system, and we are hoping to hear back from them sometime soon.... As this mod' doesn't apply to the fuselage, we will be going ahead with the painting of that early in the New Year.
Looking at what's left to do, it's mainly a case of assembly once the paint is on. Sam (quite rightly) focused on various aspects of the restoration project at an early stage which now leaves us with putting it all together, rather than having restoration AND assembly to do at the same time.
Excitement level has gone from a 7 to an 8.5 for me in the past few weeks...!!!
02/01/14
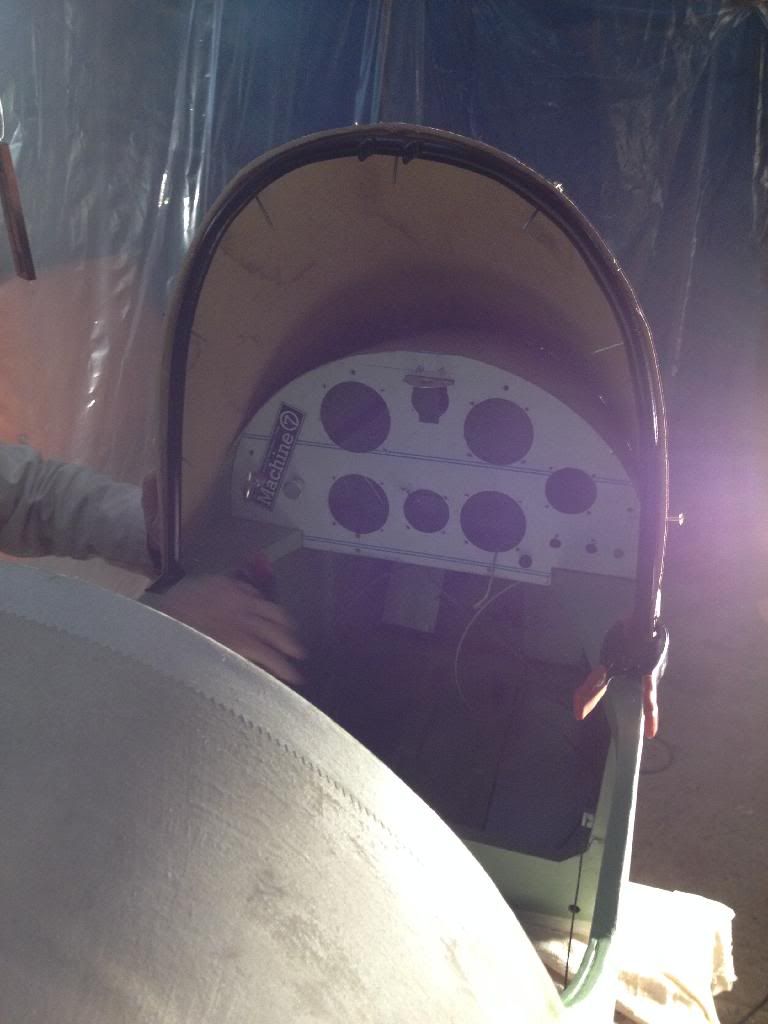
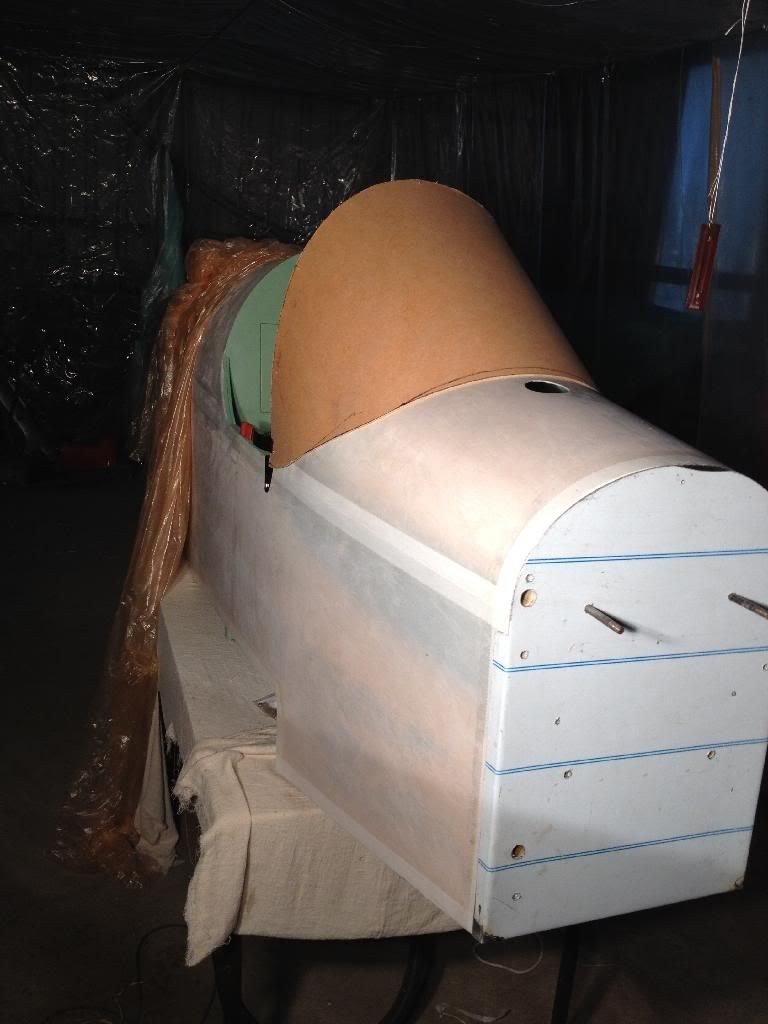
We decided to tackle the windshield yesterday, making sure that painting (the next major step) doesn't happen before any of the fiddly jobs. The last thing we want is to be trialling different windshield shapes on and off the fresh new paint.
We made up a new template from one we already had which wasn't the best of fits. After using up a Christmas present packaging supply of cardboard, we finally cut one that had the shape we were looking for. The Lexan (my son asked if this was a lesbian from Texas (honest, he did )) will be cut later this week and mounting holes drilled before being put aside for final installation.
I've been putting off the cleaning up of the brake assembly as it looked fiddly. I went for it this morning and it turned out ok.
Manky brake assembly unit
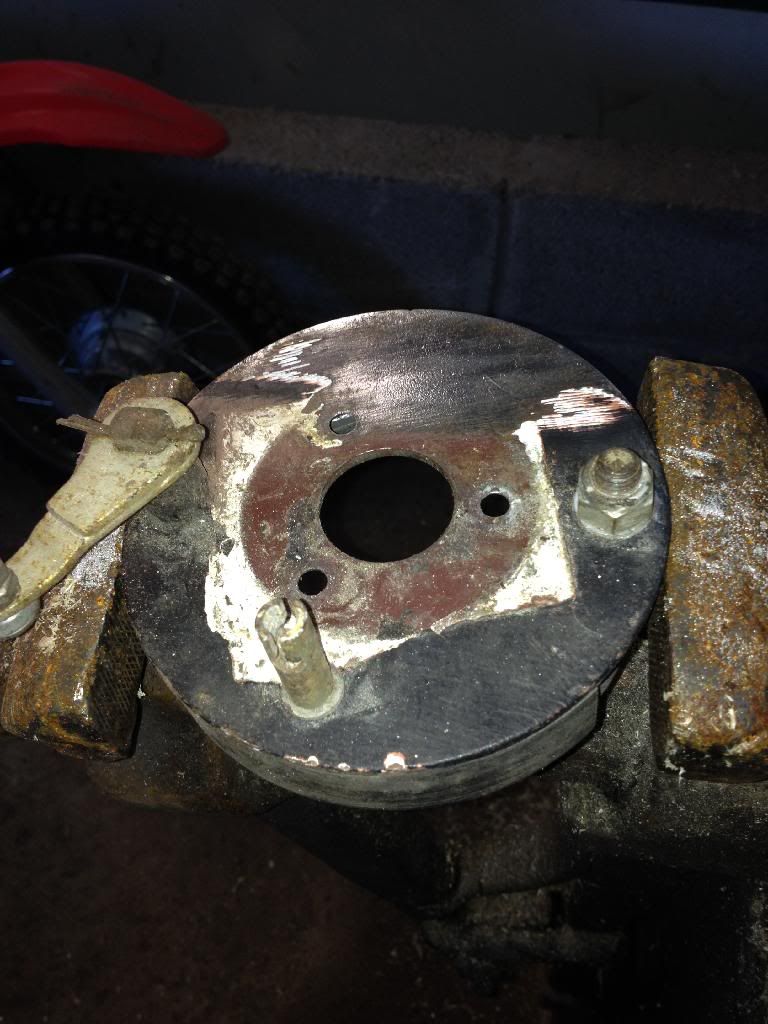
After some whizzing with my over-sized power tool...

And after painting.

I need to source some inner tubes/tyres for the wheels in the next few weeks. Does anybody have any good links for good scooter parts websites? We are pretty sure they'll be able to help us.
17/01/14
Well, it's taking shape nicely.
We've been building up to painting, and making sure nothing is forgotten beforehand. The last thing we want is to find we've painted her, and then there's something that needs doing that'll cock the paint finish up.
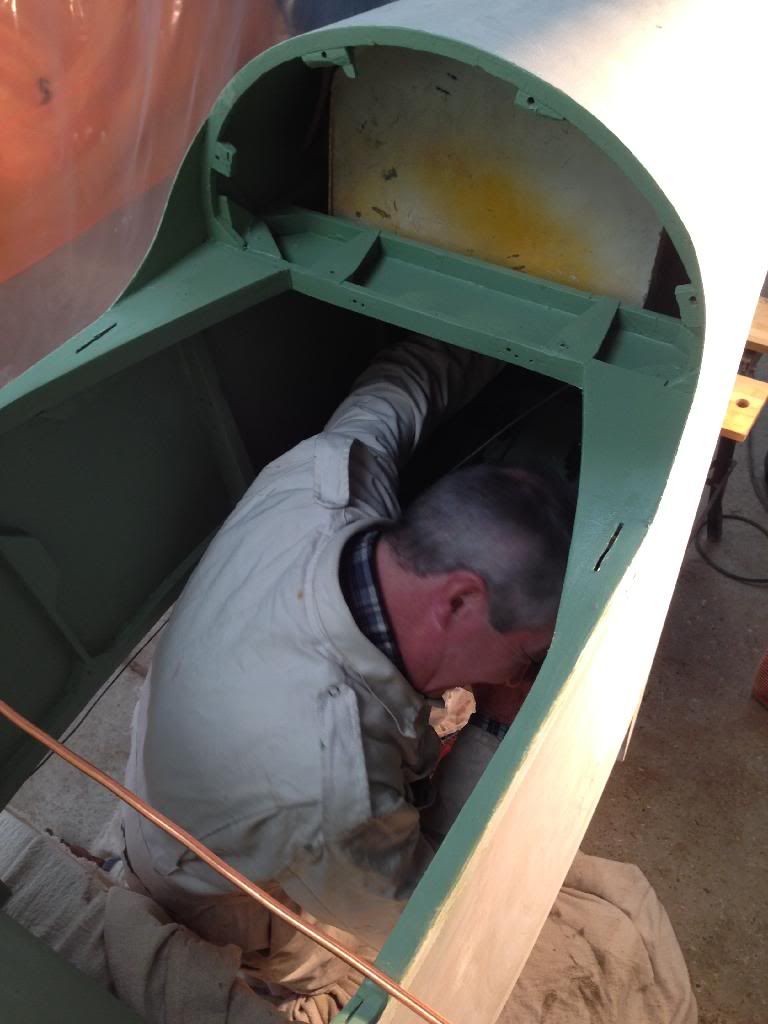
We needed to get the fuel tank plumbed in and we did this on Tuesday. The tank was temporarily installed so we could work out the direction of the pipework. After a few minutes of huffing and puffing, we (well, Sam actually), got the angle that was needed (with inbuilt 'spring' for engine movement) and we cut the ends for a secure fit.
The first photo took 4 takes because Sam was adamant I couldn't get his bald patch in the frame (!!) so please respect the fact that this was a carefully selected photo!!
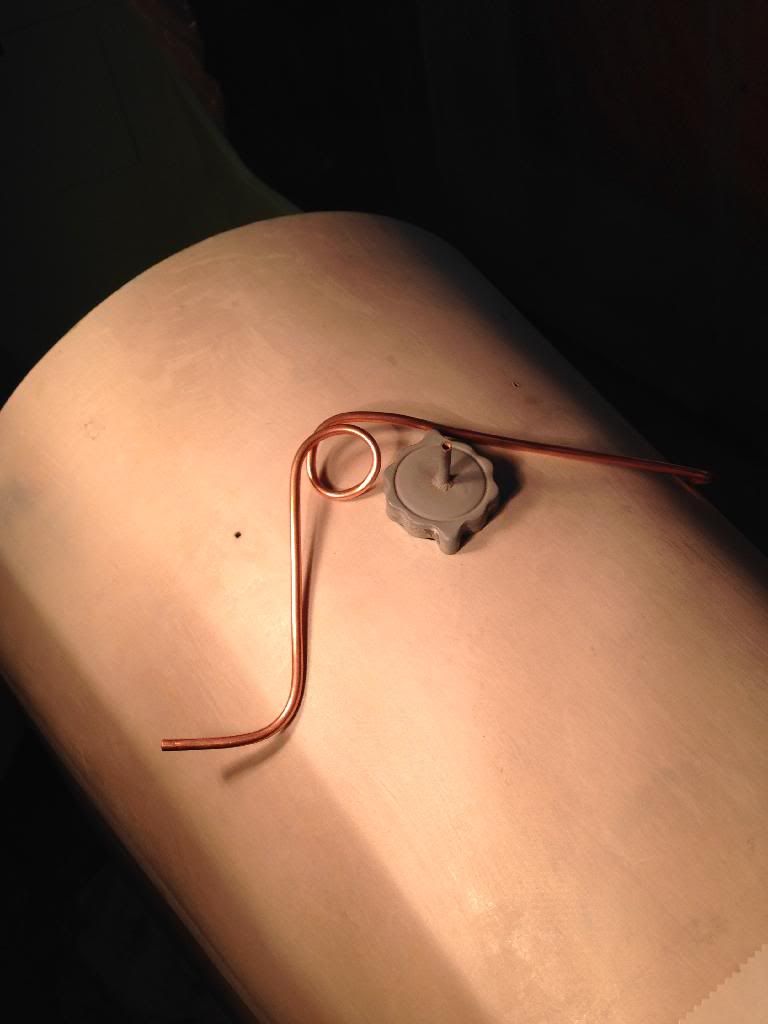
Fuel pipe after some time of careful bending. The pipe was filled with salt and sealed so that the pipe wouldn't kink when bent to shape. Clever stuff.
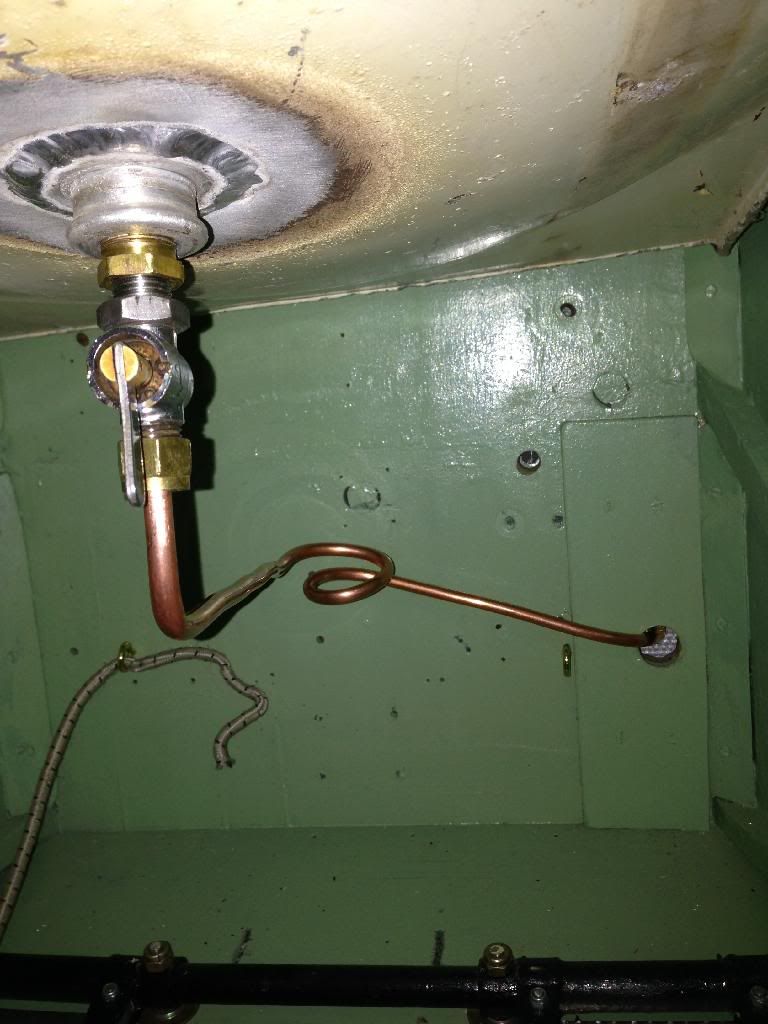
Fuel pipe from tank, all neatly lined up. Note new tank outlet, pressure tested and good for years to come.
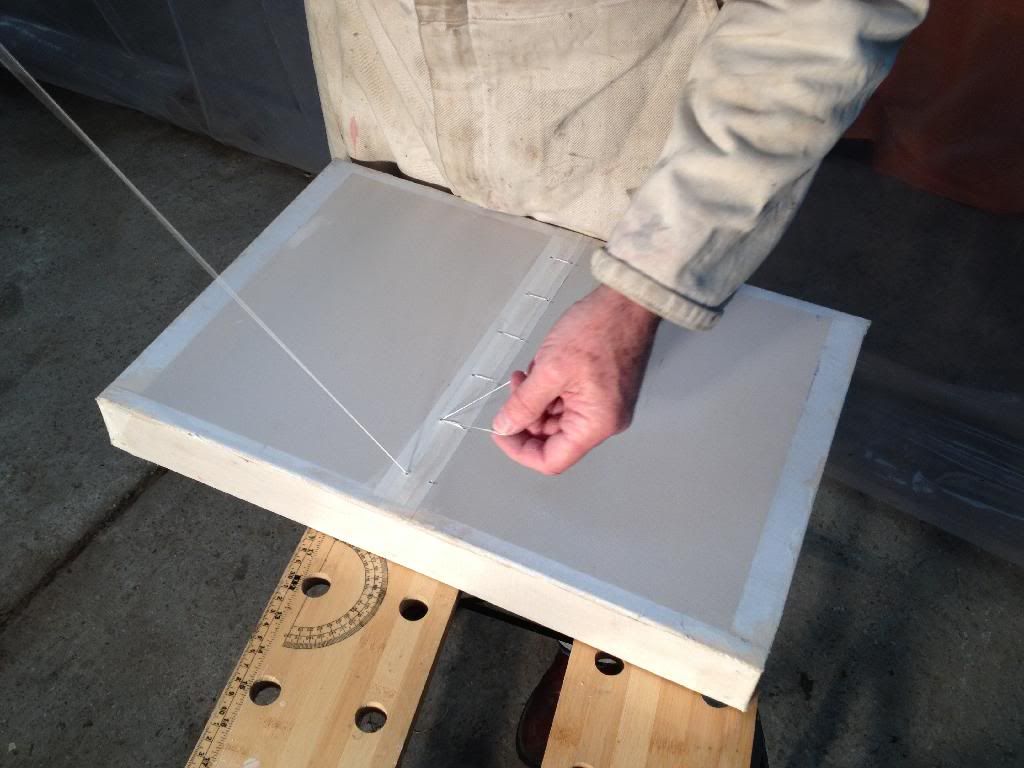
As part of our new paint system, we have been asked by the LAA to create a test panel. This is it, with rib stitching being done, ready for painting. It'll then spend several years being 'weathered' to assess how it deals with UV etc.
What I'm doing tonight, undercoating the flying surfaces. The new system is a case of undercoat x2, and then a finishing coat. It's 11 times cheaper, and has built in UV protection, a finish that's as good (if not better) than standard aircraft paint systems, and it takes a fraction of the time.
Next week, we will be painting the fuselage...