Here's what the bulkhead looks like cracked:

I removed this part of the bulkhead from the airframe I was doing the installation evaluation on
The crack will difficult to see, but more so, difficult to be certain is
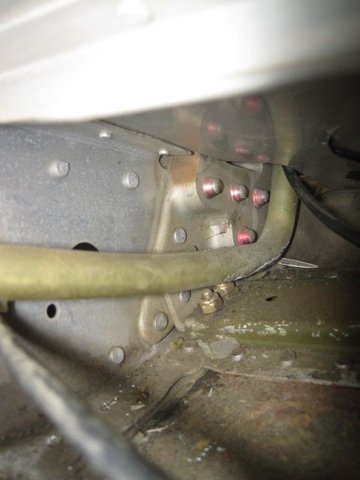
not there. The radiused cutout (above my "crack" bracket) is in a spot where the intersection of the floor and doorpost is open, and gunk can drop down, so is usually not clean. And, a fuel line passes across in front of the bulkhead, and doesn't help the view. A endoscope camera is a good way to get a look in there, though you have to be sure that the area being examined is clean, and the camera has good enough resolution to see a crack, if it were there. Though it would be very difficult to see by looking down between the floor and doorpost, the edge is exposed just below there. Cleaning the area to be inspected with a pipe cleaner soaked in solvent would certainly make it easier for the inspector. If the edge of the bulkhead were well cleaned, and you had a good magnifier, you might see the crack in the top edge of the radiused cut out by looking down from above, but that would not be a conclusive inspection by itself. It'll be necessary to look upward, outboard and toward the aft, through an inspection hole in the floor under the pilot's/copilot's heels - it's just awkward.
If the repair kit is to be installed, it's necessary to chisel off the red swaged collars over the HiLock pins holding the strut attach forging. It's really difficult to work up under there, even after cutting away the floor as per the Cessna instructions. And, it's vital that while chiseling off the collars, the chisel is not allowed to slip and scar the forging itself. The view under the floor in doing the inspection (on a happily really clean plane!) is: